Last year around this time I realized I wasn’t overly happy with…anything. Work was stressful and I was in a bad mood most of the time. I couldn’t really pinpoint what the cause was so on a whim I checked the app store for an app I could use to track my mood. I wanted to check off a lot of the things I did in a day that I thought my affect me and then review it later.

I landed on Dailyio (I pay to unlock the full reporting) and went to work adding in a few items I wanted to track including whether or not I was frustrated with work, had a lot of meetings or if I was able to focus and make progress on things. There are a lot of default options to start with and then anything I noticed I did often, like drink water or not, watch TV/movies, play games and so on I added.

Here is what I discovered somewhat quickly:

  • Drinking water and taking walks boosted my mood
  • Too much caffeine tanks my mood
  • Video games and TV do not boost my mood a lot but listening to music does
  • Making progress and being able to focus at work boost my mood while too many meetings and interruptions tank my day
  • Going out with my wife on a date is a booster but spending time with extended family quickly drains me (I love you all but I get overwhelmed/drained quickly. It’s not you it’s introvert problems)
  • Related to the previous one, not getting enough time to myself was among the biggest factors in determining how I felt day by day.
  • Cooking, cleaning (easily the biggest surprise for me), writing and travel are all boosters
  • Skipping breakfast is horrible
  • Even a small decrease in sleep quality affects my day. This is something I have always intuitively understood but having data to back it up is great

Aside from quick lessons I have now logged just over a year of data and it has become apparent as well that some patterns follow a yearly cycle. My daily average mood has gone down significantly as my end of year work load has gone up.

After gathering some data for a while I quickly made a few changes early on. I made sure to drink a bit more water than I usually would and have a bit less caffeine (through coffee or soda). I also nearly completely stopped drinking non diet soda as I found the high sugar input on the previous day caused me to feel terrible in the morning very consistently. Whenever I can, I sit and listen to music with no distractions. I take more walks when I can and don’t feel at all bad if I abandon a TV show.

Using Dailyio has been a super interesting experiment that I will continue to do so that I can keep tracking trends and doing what I can to even out my daily mood. Just using what I learned in the first few months I was able to change habits and routines so that I placed an emphasis on doing the things that truly led to better outcomes each day. There are things I assumed were beneficial to me that turned out to be incorrect and removing them from my life didn’t have the impact I thought they would.

If you are at all interested in this sort of thing I highly recommend finding an app, either Dailyio or something like it, that allows you to tracking and report on what affects your mood from day to day.
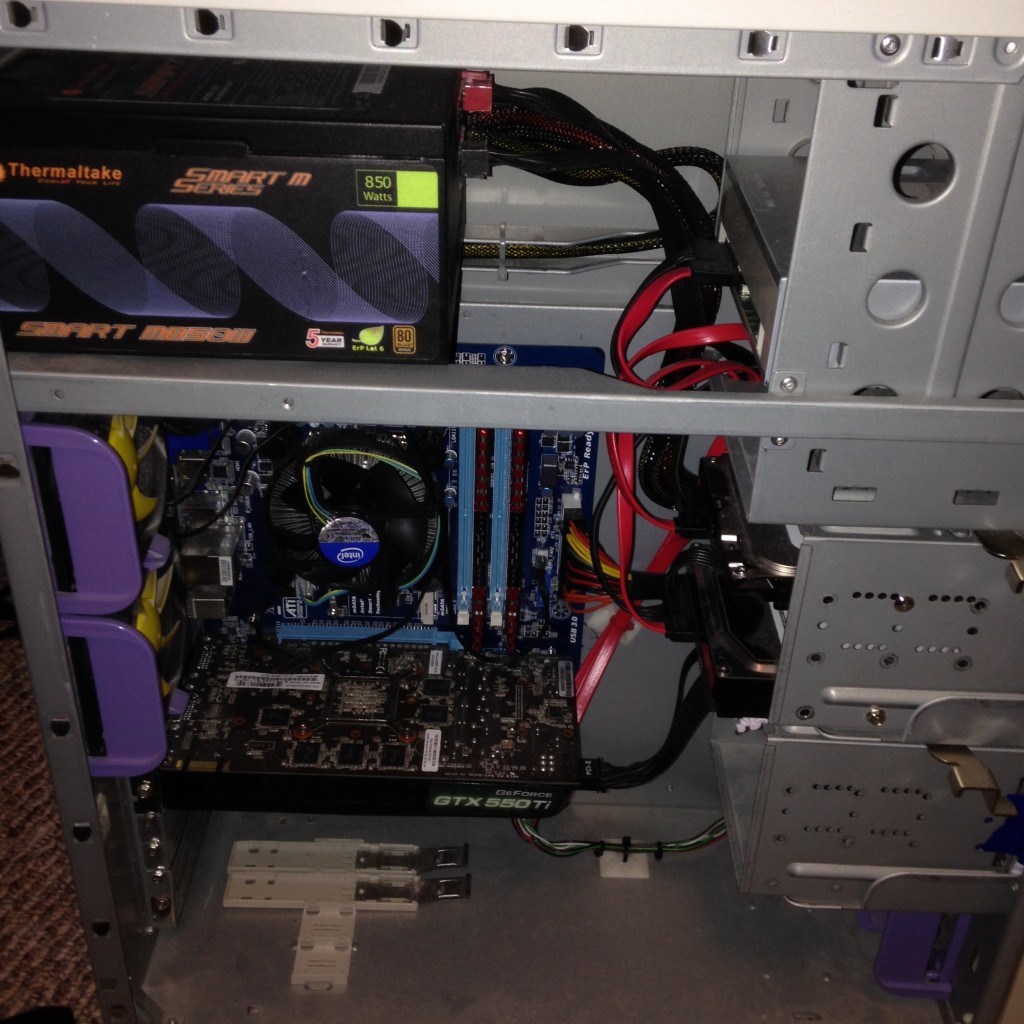
Valve recently released SteamOS into the wild in beta form and as soon as I could I downloaded it and got it installed on my low to mid range gaming PC.  My motherboard, CPU and RAM are newer but the GPU is a bit on the older and inexpensive side.  That said, it is very capable of running SteamOS and I imagine anyone who has built a gaming rig in the last few years will be able to run it.

Step One: Have a PC

Step One: Have a PC

Actual hardware requirements for SteamOS aren’t outlandish requiring any 64bit capable Intel/AMD CPU, 4GB memory and at least a 500GB HD.   The harder requirement is that the motherboard must support UEFI booting.  There are work arounds to this requirement but it’s beyond the scope of this post. 

Lets get started with the installation. I’m looking at this from the perspective of a Mac user to many of the tools to get things prepared are Mac based.  Here’s what you need:

  • PC meeting the above requirements
  • Flash drive larger than 1GB that can get partitioned/formatted
  • An empty hard drive or a really good backup of your current system
  • A machine to download and prepare the installer with, I’m using a Mac with OS X
  • The SteamOS installation files (http://store.steampowered.com/steamos/download/?ver=custom)

Preparing the flash drive

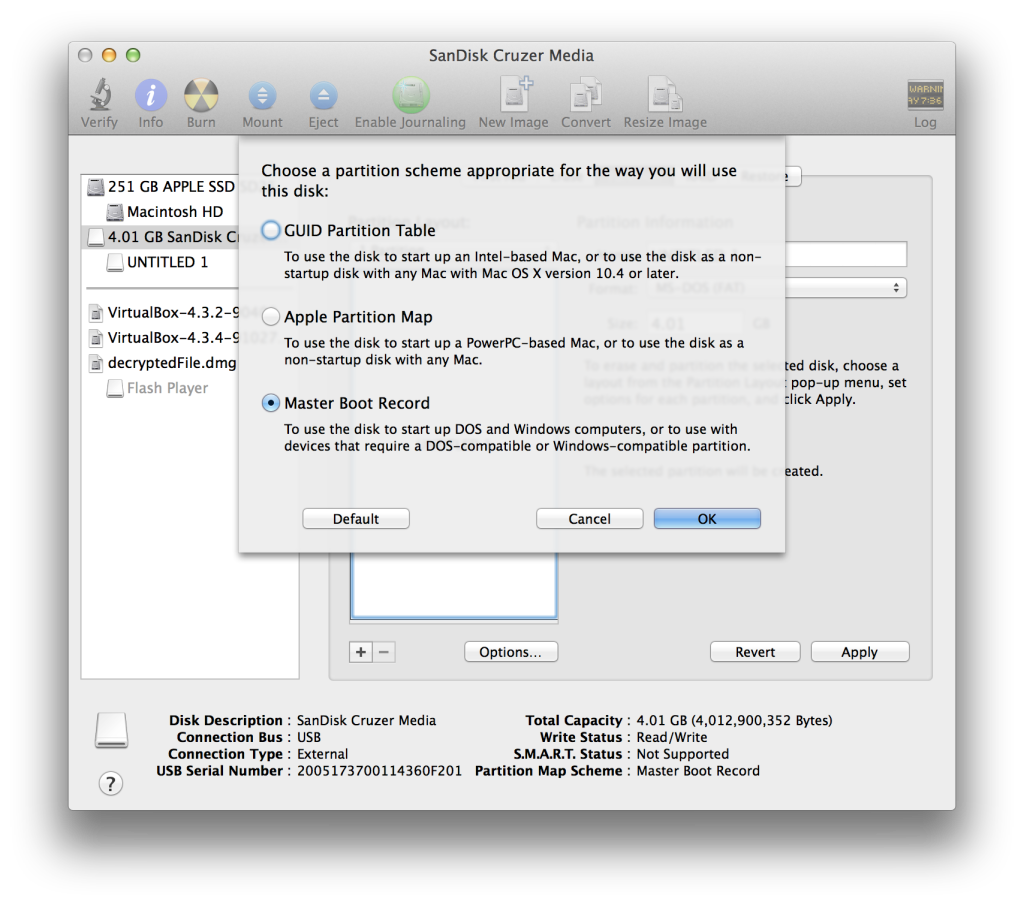
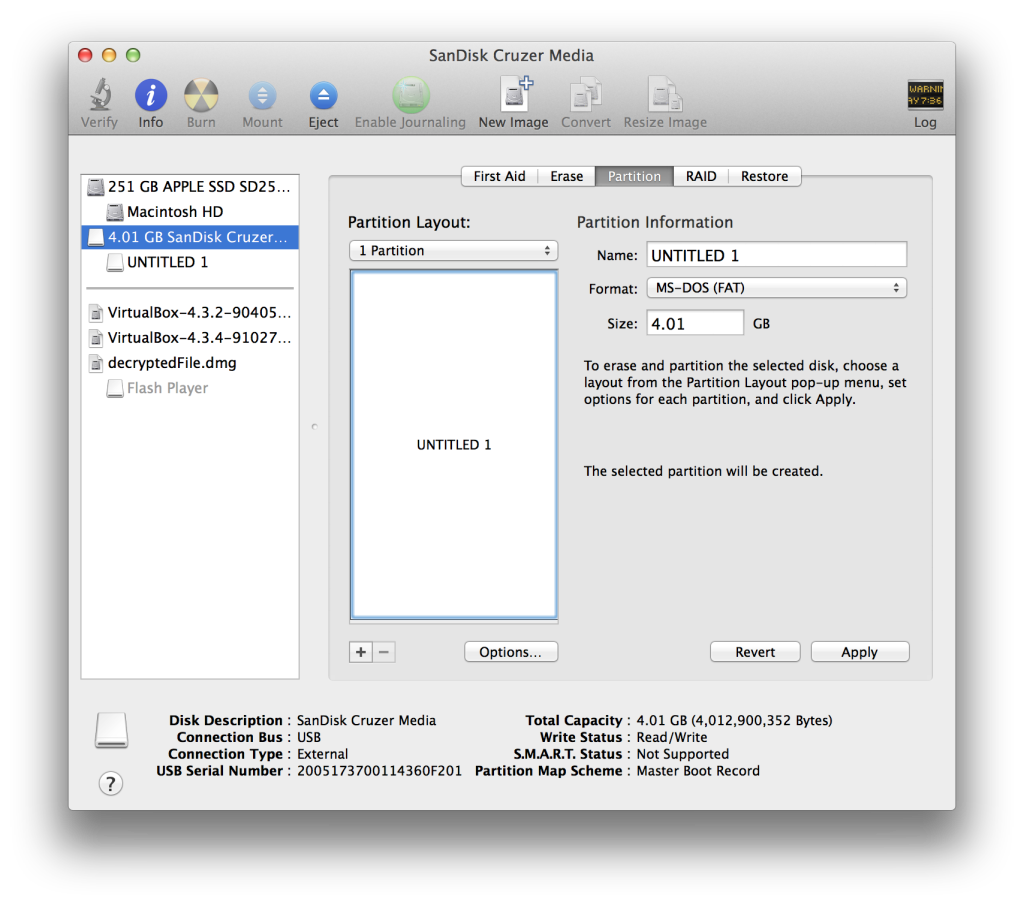
Insert the flash drive into an available USB port and start up Disk Utility.  Click once on your flash drive (it’ll be listed on the left side) and then click the Partition button.  From the partition layout menu choose  1 Partition.  Name the drive if you wish and ensure that the Format is set to MS-DOS (FAT).  Last, double check that the partition type is Master Boot Record by clicking on the Options… button.  Use the following screenshots as a reference:

Create 1 partition formatted in MS-DOS (FAT)

Create 1 partition formatted in MS-DOS (FAT)


Ensure the partition type is Master Boot Record

Ensure the partition type is Master Boot Record


When you are satisfied with the parameters click the Apply button and finally the Partition button.  Your flash drive is now ready to copy the SteamOS installation files to.

Copying files to the flash drive

Download the installer files and extract them if they aren’t already. I’m going to assume that the files were extracted into your Downloads directory.  If not, then you’ll need to adjust the paths used in the next command.  To copy the files to the flash drive I used rsync in terminal.  This ensures the files are copied including any hidden files. Use the following command:

rsync -av ~/Downloads/SteamOSInstaller/ /Volumes/UNTITLED\ 1/

Remember to adjust any paths depending on how you named your flash drive or if you didn’t extract the SteamOS Installer files in your Downloads directory. Also note that there IS a trailing slash on the SteamOSInstaller directory.  This is important!

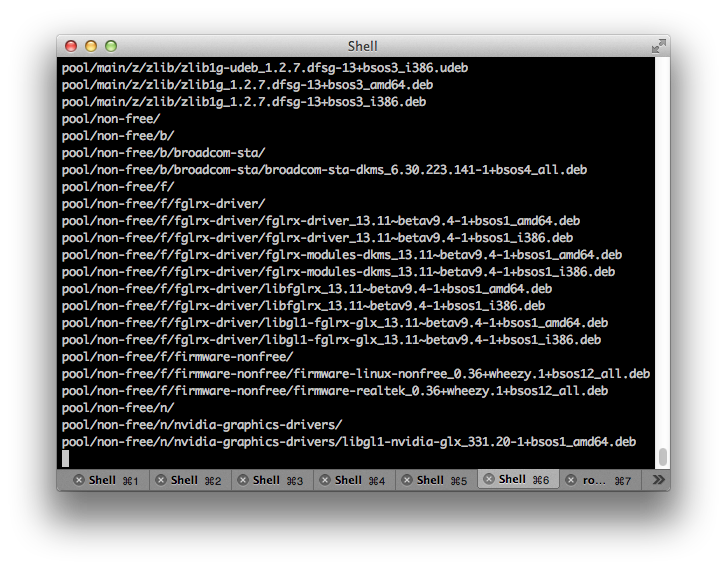
Copying files to the flash drive can take some time

Copying files to the flash drive can take some time

Press enter and allow the rsync operation to finish.  Once done, eject the flash drive using Finder.

Prepare the target PC

To prepare my PC for SteamOS I unplugged all of my internal drives.  This absolutely vital if you don’t want to risk having your existing hard drives wiped clean! I happen to have an extra 500GB drive sitting around for this project and if you don’t or don’t have your PC backed up, then stop here because you’re about to lose everything.

If I haven’t scared you off, then we can continue.

In my BIOS I ensured that all of the UEFI boot options were either enabled or would occur first.  This step is going to be different on each motherboard so you’ll need to play around to make sure things are right.  Basically:

  • Ensure the system will boot using UEFI at all
  • Ensure that UEFI booting is enabled for USB ports and USB flash drives
  • Ensure the UEFI is used before any legacy option

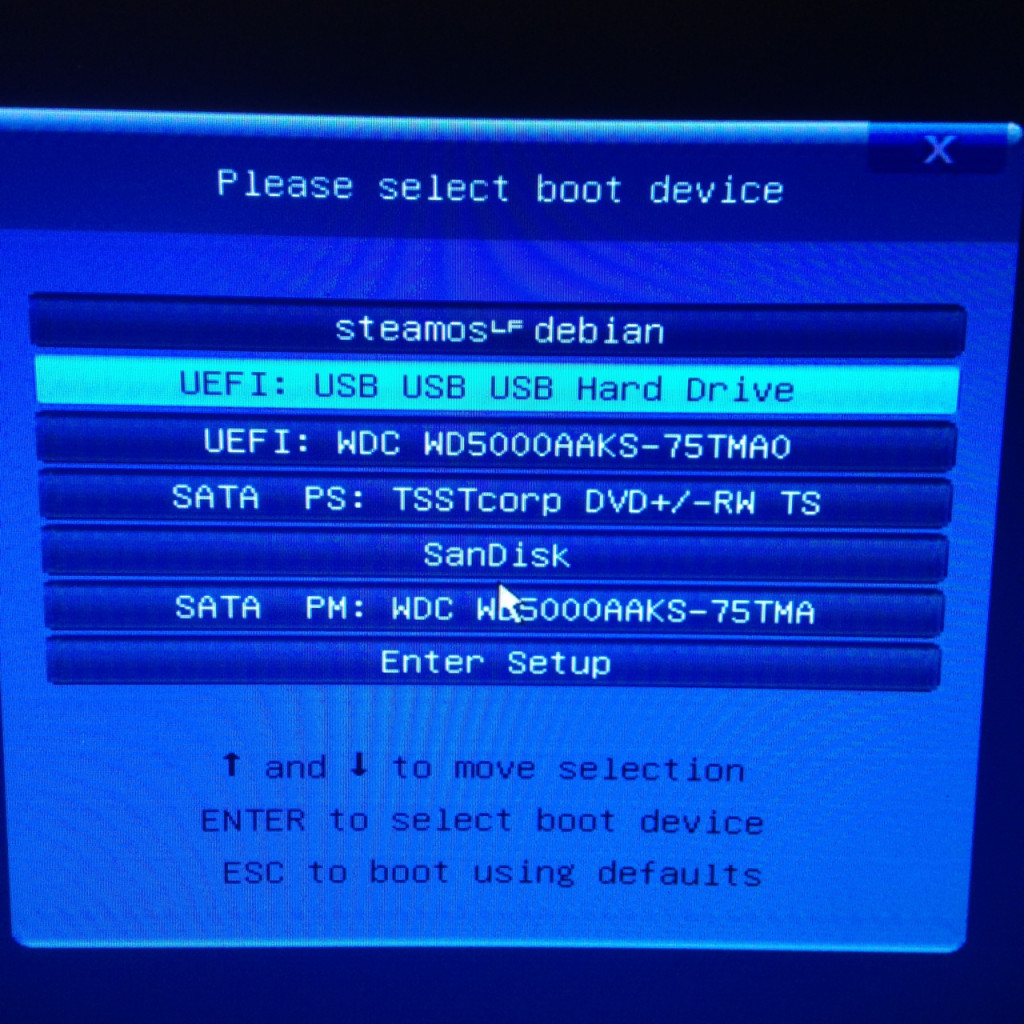
Insert the flash drive into a USB port on your computer and boot it.  Enter your motherboards boot menu if you have one or set your system to boot from USB first.  My system allows me to bring up a boot menu and I pick the EUFI USB Hard Drive option:

Boot menu

Boot menu

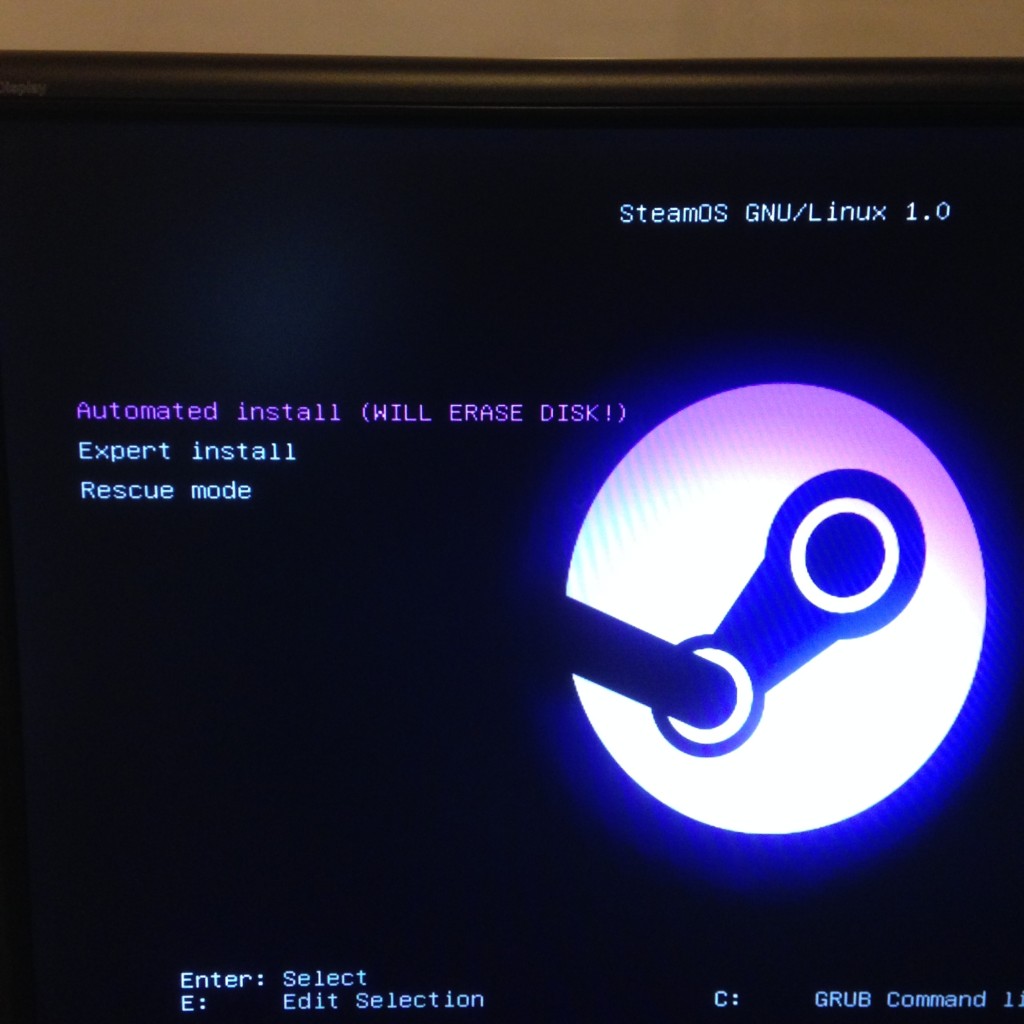
You should then see the following:

I picked Express Install

I picked Automated Install

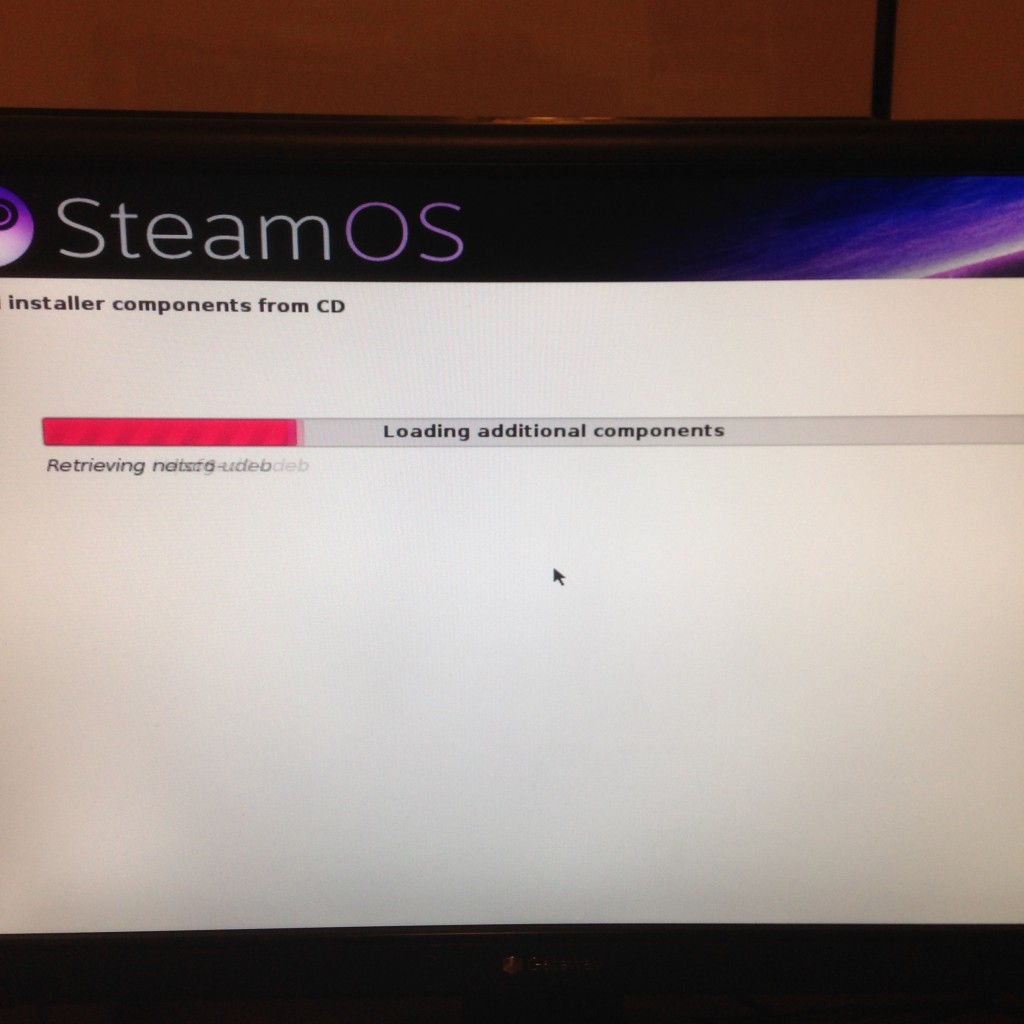
Pick Automated Install and the first phase of the SteamOS installation will get started.  You’ll be looking at a lot of these for awhile:

Progress bars

Progress bars

Allow this phase to complete.  Eventually you’ll be told the system is going to reboot. When it does, remove the flash drive. SteamOS will then reboot to a standard login screen.

Initial Configuration

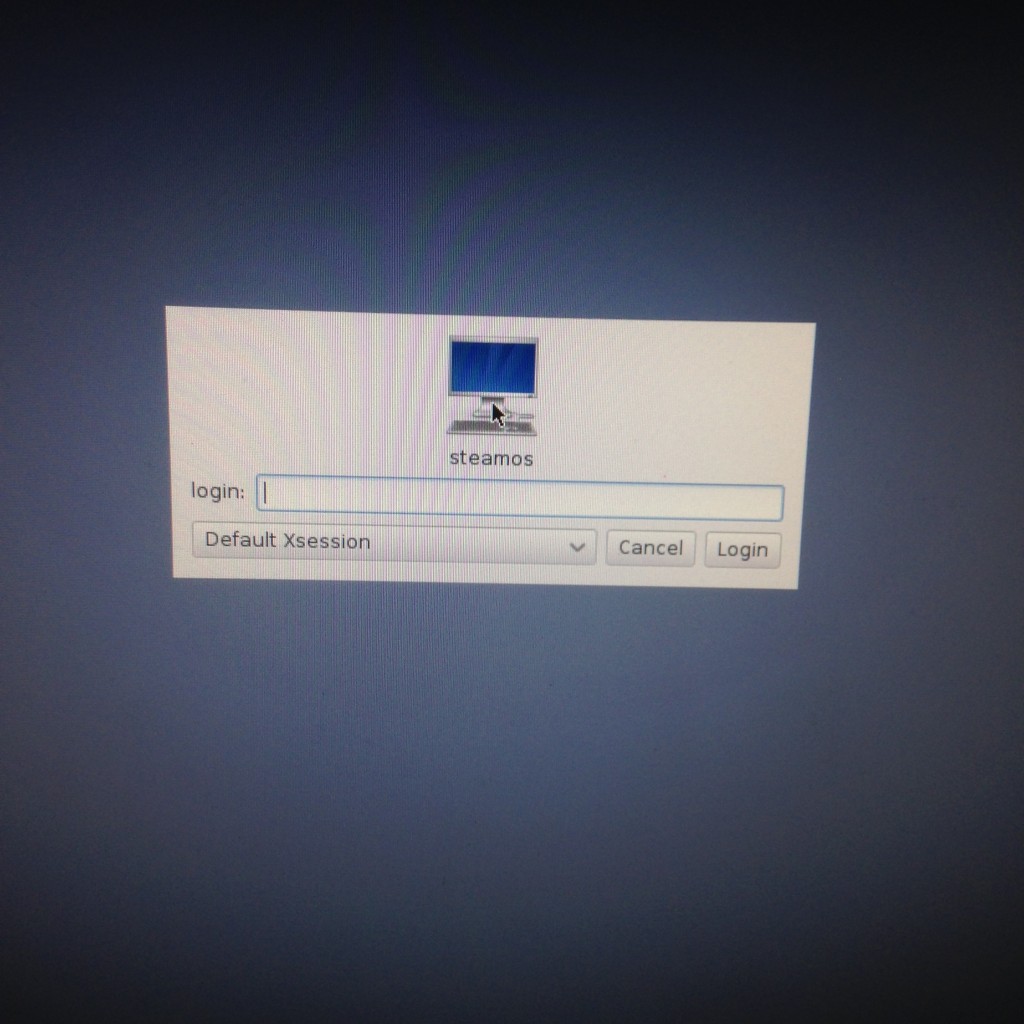
At this point you are faced with a standard login screen.  Do the following:

  1. Enter steam for the username, press enter
  2. Enter steam for the password, press enter
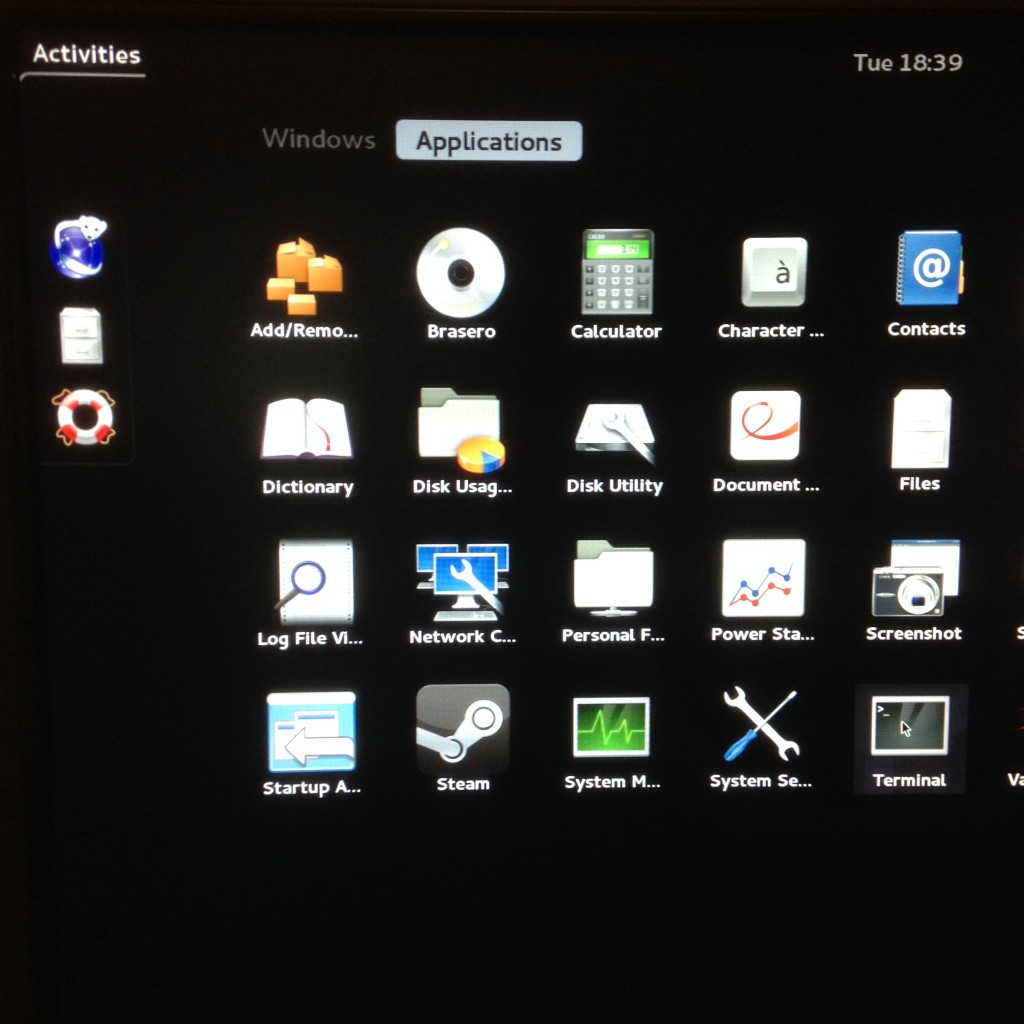
  3. Click Activities in the upper left
  4. Click Applications
  5. Click Terminal
  6. Type in steam and press enter
  7. Accept the EULA
  8. When finished, log out
    1. Click steam in the upper right
    2. Click logout
    3. Click the logout button

Here are some screenshots for reference:

The login screen

The login screen

Starting terminal

Starting terminal


You must now login as the desktop user by doing the following:

  1. Enter desktop for the username, press enter
  2. Enter desktop for the password, press enter
  3. Click Activities in the upper left
  4. Click Applications
  5. Click Terminal
  6. Type ./post_logon.sh, press enter
  7. Enter in desktop as the password, press enter

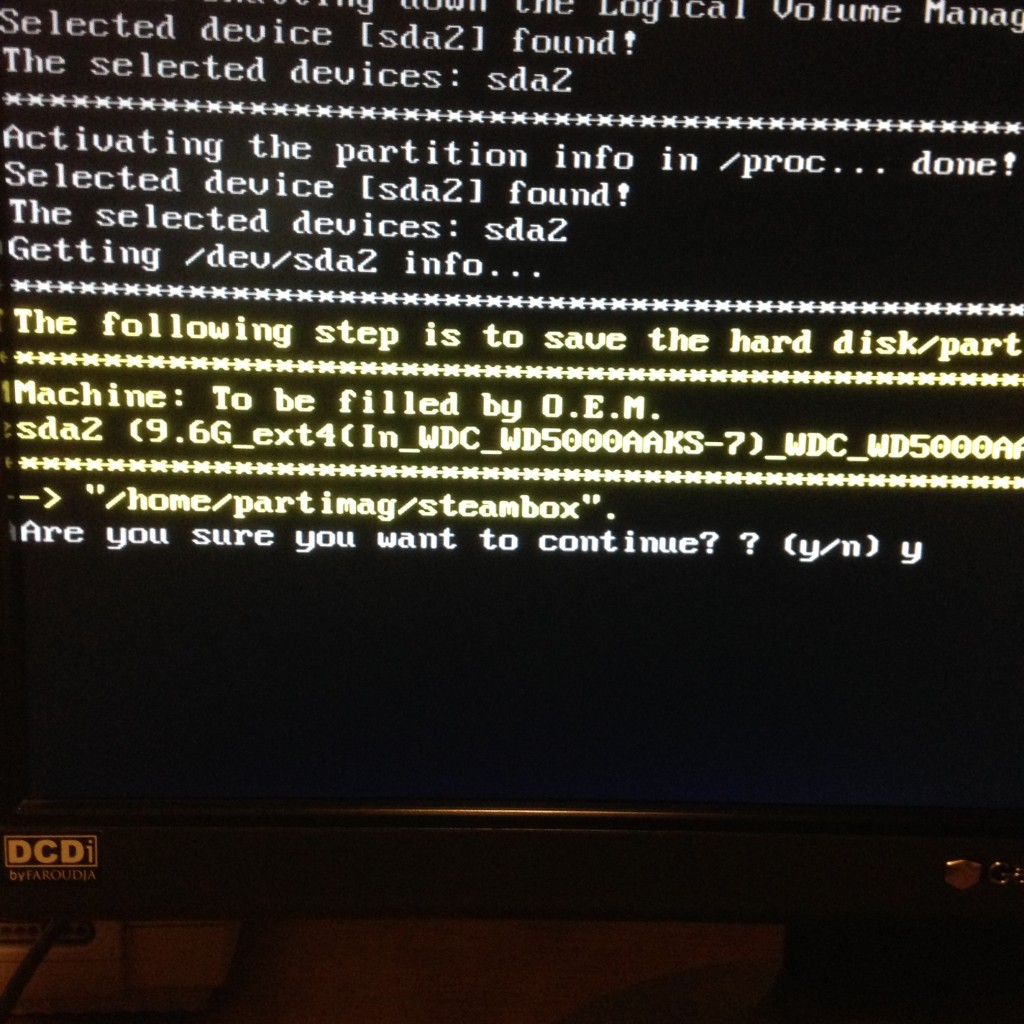
The system will now perform a number of post phase 1 install routines and then reboot.  After rebooting the system will create the system restore partition. You simply answer yes to a question and the rest is automated.

Just say yes

Just say yes

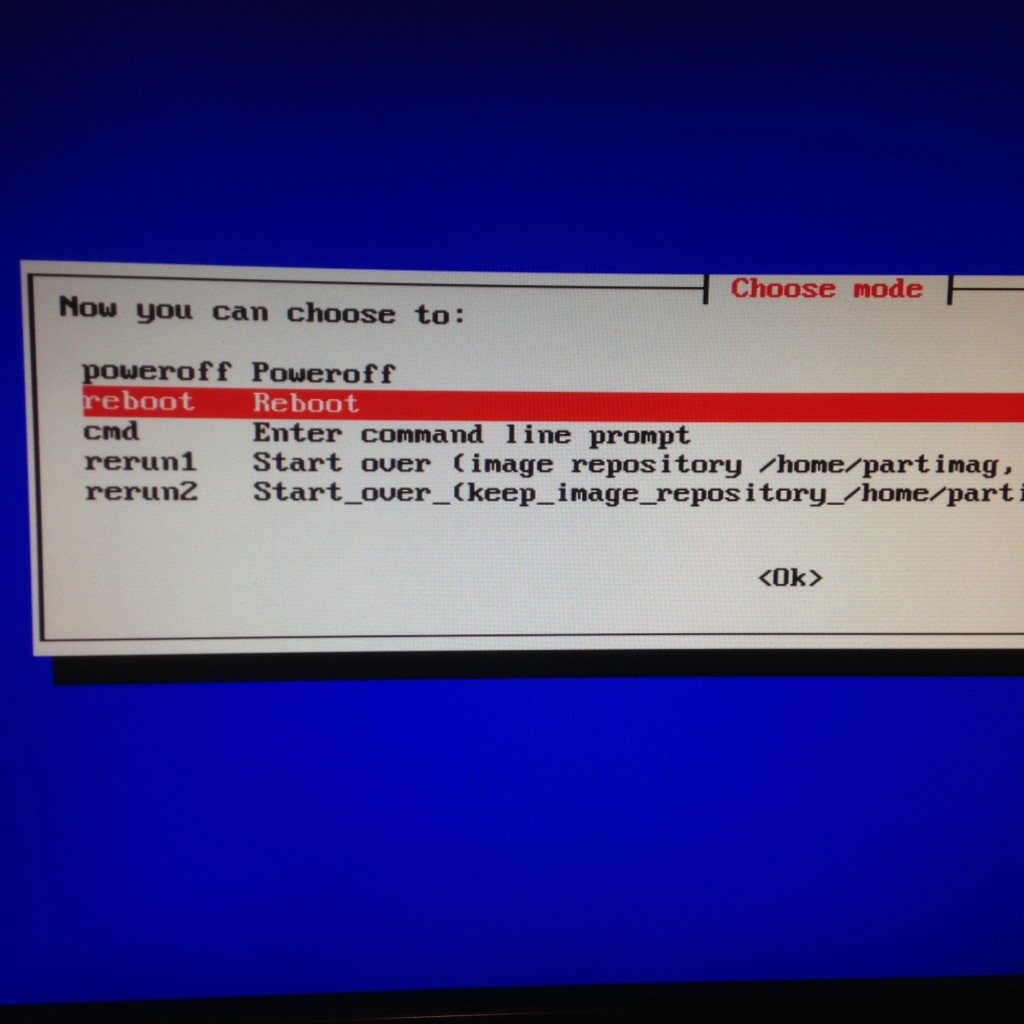
Pick reboot and press enter

Pick reboot and press enter

Once completed the system will reboot again into SteamOS and finally into Big Picture Mode where you can create or log into your Steam account. The initial boot up can take some time so be patient.  You are now ready to go!

One of the great things about tent.io is how it discovers where your server is.  This is important because it is possible for you to keep your tent entity URL indefinitely but change what server is actually responsible for acting on behalf of it.  http://tent.io/docs/server-protocol details how the process works so I won’t get into here.  I’m going to quickly cover how you add this header in Apache in a VirtualHost config file or .htaccess file.  If you only have access to change your .htaccess file go ahead and do so there, if you can edit your virtual host config file you can do it there as well.  The end result will be the same.

The format is the same in either the VirtualHost config file or .htaccess file.  It is simply:

<ifModule mod_headers.c>
  Header set Link "<https://controlplane.tent.is/tent/profile>; rel=\"https://tent.io/rels/profile\""
</ifModule>

Replace “https://controlplane.tent.is/tent/profile” with the location of YOUR profile.  Place the above text directly into your .htaccess or within the <VirtualHost></VirtualHost> stanza of your virtual host config file.

If you edit your virtual host config file, you’ll need to reload or restart Apache for the changes to take affect.  Keep in mind that you can’t add headers to a redirect so if you use a redirect to add www to your site address (for example) you can’t put it in the redirect stanza.

You can test the results using curl -I <hostname> or online using http://web-sniffer.net

World IPv6 Day is fast approaching and it’s far easier to configure IPv6 than I knew, even if your ISP doesn’t provide you with IPv6 addresses.

That said, there are a few things you need in place before you get started.

  • A working internet connection
  • Either be connected directly to the internet (your host needs a public IP) or be using something other than an off the shelf broadband router.

If you mean the above requirements then simply head over to http://www.tunnelbroker.net/ and register for an account.

Once registered and logged in perform the following:

  • Click “Create Regular Tunnel” under User Functions.
  • Copy and paste the “You are viewing from:” IP address into the form field above
  • Choose the tunnel server closest to you
  • Click “Create Tunnel”
  • Once created, click on the Example Configuration tab and follow the example config options for your system

That’s it. You should now be able to access IPv6 enabled sites like ipv6.google.com and www.v6.facebook.com. On June 18, 2011 a number of large sites will be adding AAAA records for their main addresses (www.facebook.com for example) which has the potential to break connectivity for users who have an improper IPv6 setup. The best option is to be prepared for the day by ensuring you’re accessing the Internet using IPv6. You can also test your connection (with or without IPv6 enabled) at http://test-ipv6.com/.

In a future post, I’ll detail how to use this same tunnel broker service to create a Linux based IPv6 router and firewall. IPv6 will work very differently from IPv4 in how addresses are assigned to you the end user. In short, every device in your home in the future will have a public Internet address meaning steps must be taken to ensure devices inside your home are protected with a firewall.

Honestly I don’t think this is news except for the information they provide at the bottom while comparing Macs. You can now take a look at the amount of greenhouse gases generated during the life of the Mac and a break down of how much of material is used in production. You can also see how much power each one uses in various modes.

Try it for yourself at the Apple Store